How to Etch Runes on Bitcoin Rune (RuneBTC.xyz)
Etch Runes with Bitcoin Rune (RuneBTC.xyz)
Etching initiates the token creation process by specifying attributes such as the token’s name, divisibility, symbol, and other immutable properties. This step marks the beginning of creating a rune.
In this tutorial, you will learn how to etch runes tokens so you can start participating in Bitcoin’s new token economy.
Etch Runes
Step 1: Visit the Bitcoin Rune Home Page and click the “Etch” on the top of homepage. Then connect wallet.
Step 2: Before filling out the form, please select the option that suits you in the “Type” section. There are two options available:
- Open Mint For Everyone
- Fixed Total Supply
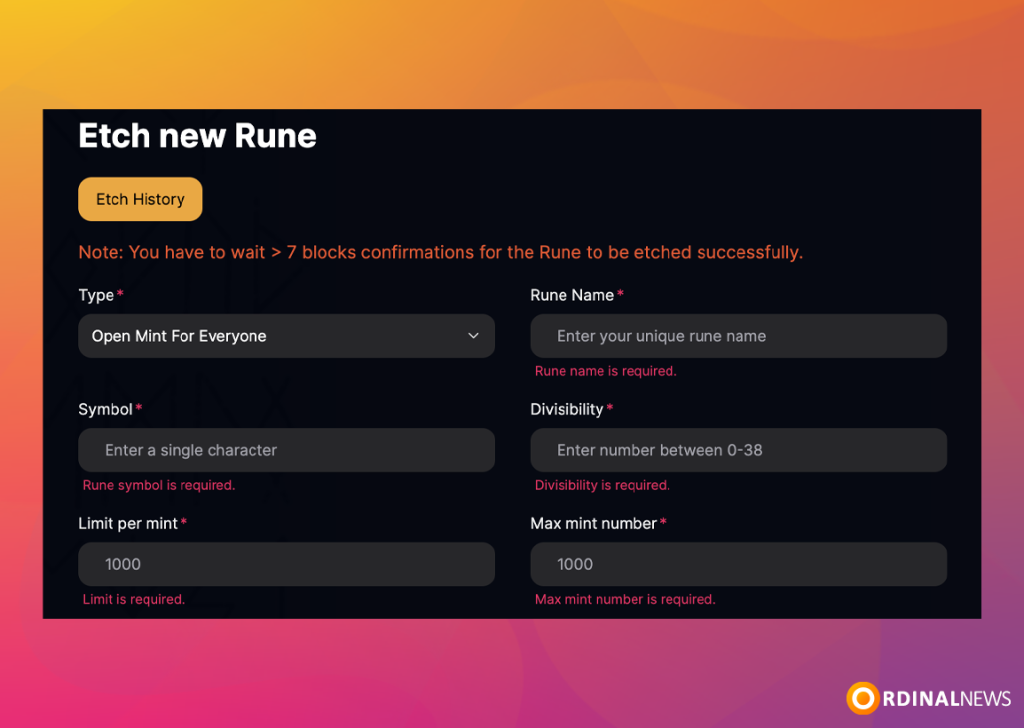
Step 3: Since there are two options, there may be differences in how the form is filled out. Therefore, we will show you step by step how to fill out both. Let’s start with “Open Mint For Everyone“:
- Rune Name: The name of your token.
- Symbol: The short symbol for your Rune token.
- Divisibility: Divisibility of your tokens. Default is 0, choose between 0 and 38.
- Limit per mint: You need to specify the maximum number of Rune tokens that can be acquired in a single mint.
- Max mint number: You need to enter the maximum number of times minting can occur.
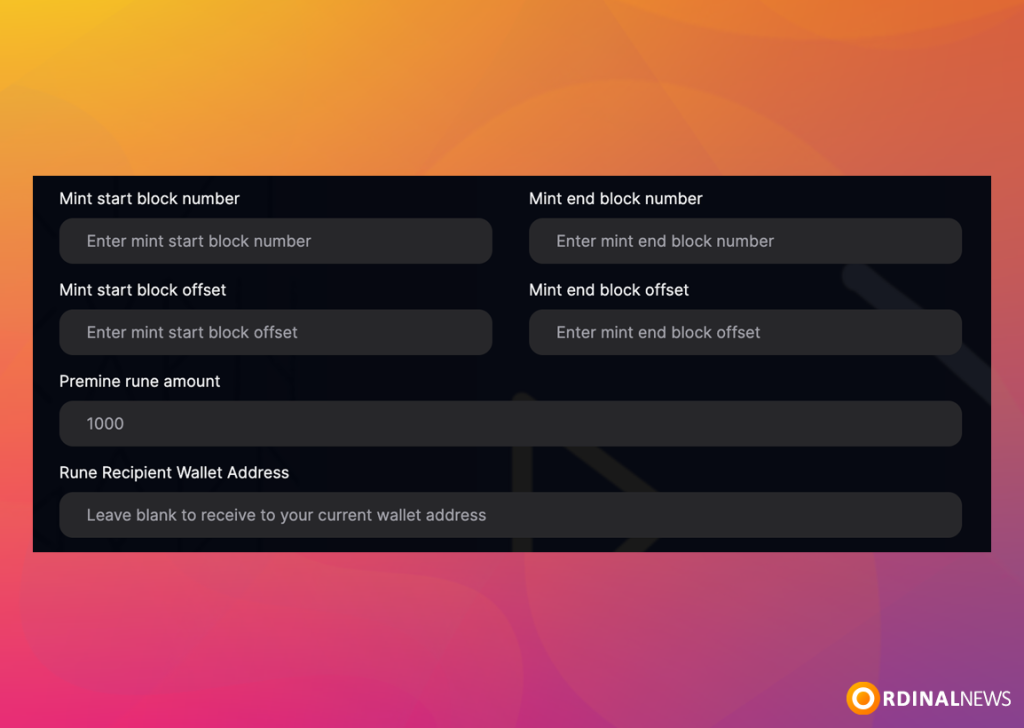
- Mint start block number (optional): You need to enter the block number at which the minting will begin.
- Mint end block number (optional): You need to enter the block number at which the minting will end.
- Premine rune amount (optional): The amount of Rune units which the etcher can optionally allocate to themselves.
- Rune Recipient Wallet Address: If you want to receive it at a different address rather then your own, you can enter it here. If you want it to be sent to the address you will etch, you can either leave this field blank or enter the address you will use for etching.
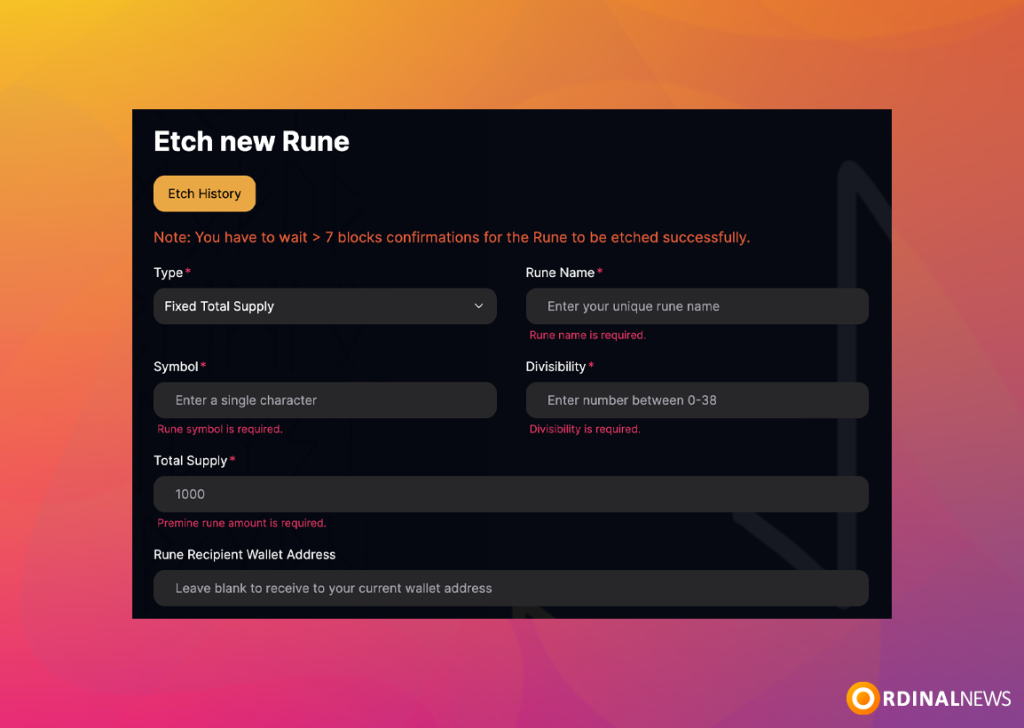
Step 4: Next is the “Fixed Total Supply” option
- Rune Name: The name of your token.
- Symbol: The short symbol for your Rune token.
- Divisibility: Divisibility of your tokens. Default is 0, choose between 0 and 38.
- Total Supply: The maximum number of units that can ever be created for a Rune.
- Rune Recipient Wallet Address: If you want to receive it at a different address rather than your own, you can enter it here. If you want it to be sent to the address you will etch, you can either leave this field blank or enter the address you will use for etching.
Step 5: After selecting the method by which you will etch your Runes, you can upload an image for your Rune token. This is completely optional, and you are not required to upload an image. After that, you can choose “Fee Rate” section shows you how much it costs for Etching Runes.
You can also set the network fee here. The picture shows “Fast 15 sats/vB”. Click on the “Fast 15 sats/vB” option, and then click on “Custom Fee Rate” to set the network fee rate.
After selecting your “Fee Rate,” you need to agree to the “Terms of Service” and “Risk Warning” policies implemented by Bitcoin Rune (RuneBTC.xyz). Then click “Confirm Etch Commint”.
Step 6: Confirm the Transaction
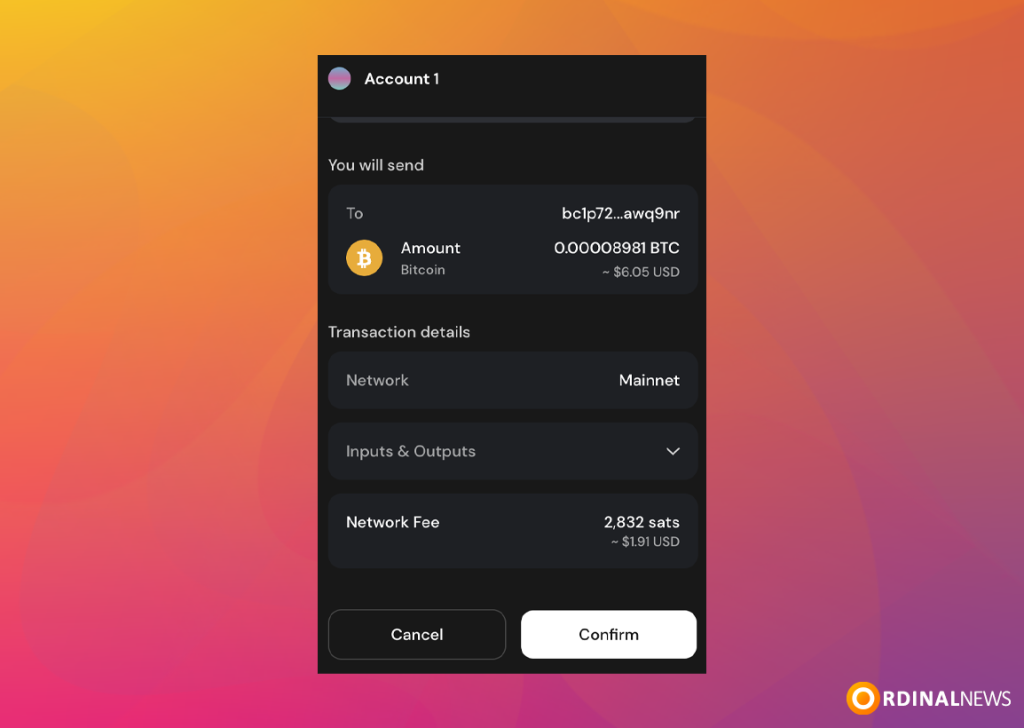
After confirming your details, submit the etch request. You will need to sign the transaction and pay using Bitcoin from your payment address.
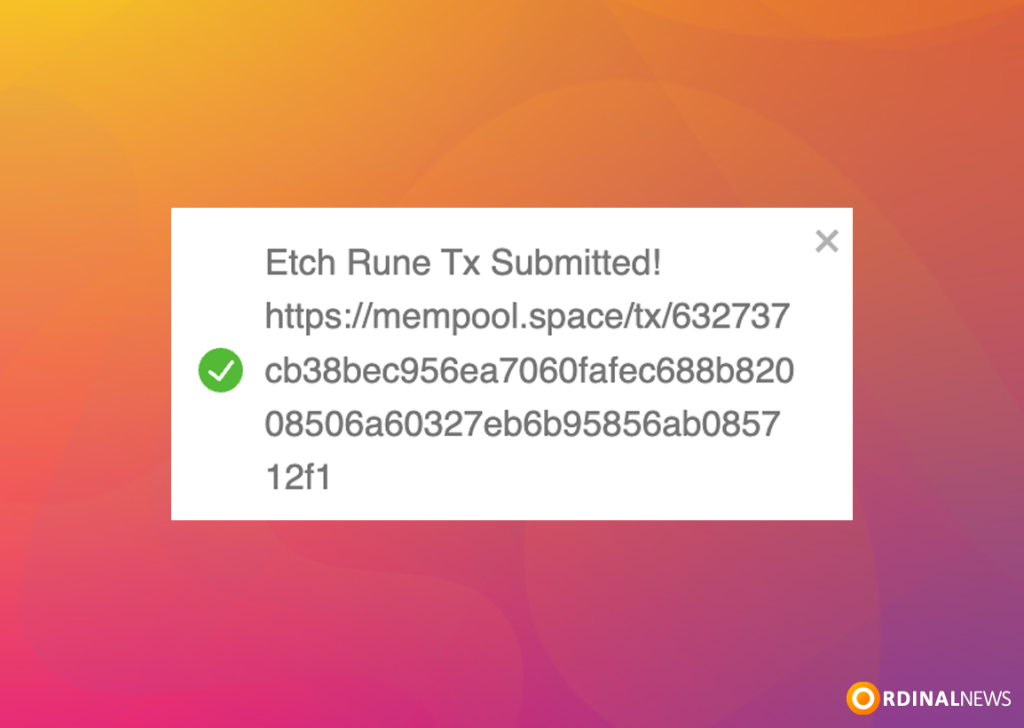
Step 9: After confirming the transaction with your Bitcoin wallet, a notification will appear in the top right corner, which includes the transaction link. By clicking on that link, you can track it through Mempool.
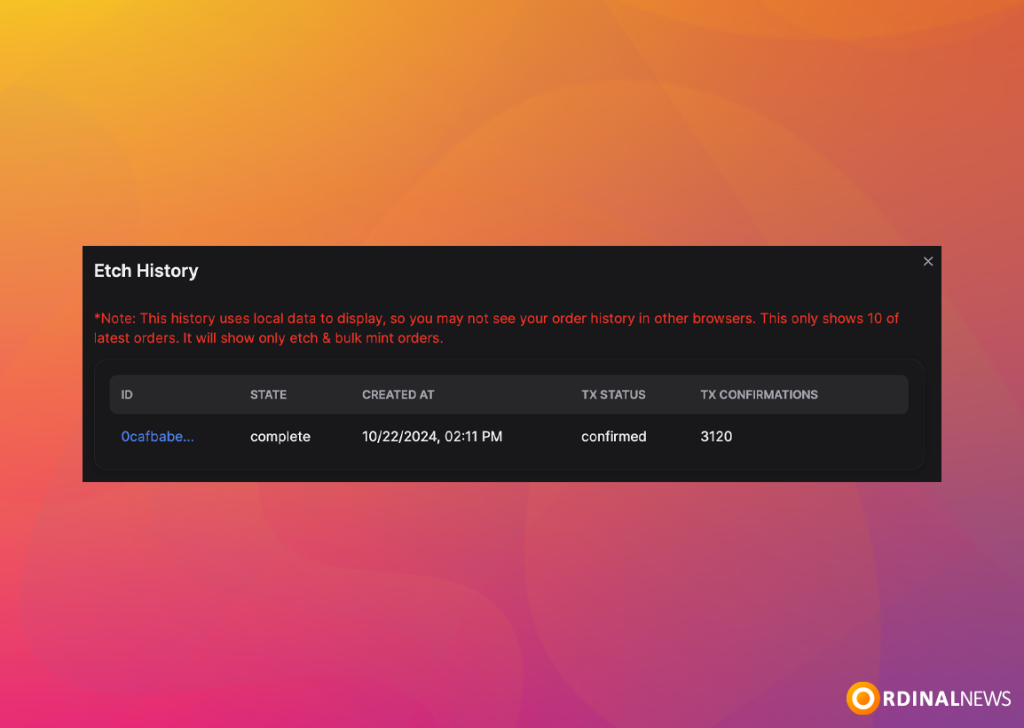
If you lose the link, you can still track your transaction by going to the “Etch History” section and clicking on the link under “ID.”
Etching a Rune may take 60-90 minutes. Once that’s done, the road to minting is clear.
Etching Runes with Bitcoin Rune (RuneBTC.xyz) is a simple and efficient process, allowing you to participate in the emerging Bitcoin token economy with ease. By following these steps, you can create your own Rune tokens and customize their properties. Whether you’re exploring the tokenization potential on Bitcoin or planning to launch a project, this guide offers the fundamental steps to get started.
