How to Etch Runes on UniSat
Etch Runes with UniSat
Etching initiates the token creation process by specifying attributes such as the token’s name, divisibility, symbol, and other immutable properties. This step marks the beginning of creating a rune.
In this tutorial, you will learn how to etch runes tokens so you can start participating in Bitcoin’s new token economy.
Etch Runes
Step 1: Visit the UniSat Rune Etching Page
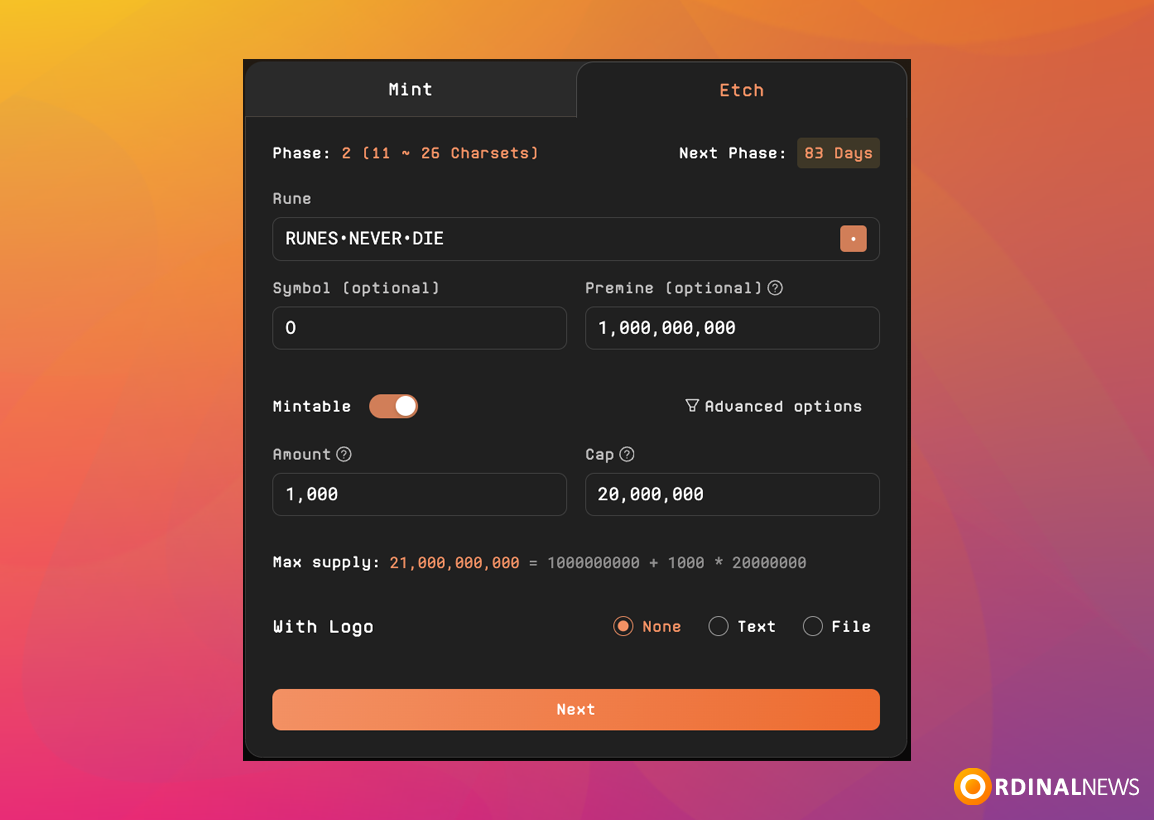
Step 2: Fill Your Rune Details
- Rune: The name of your token.
- Symbol (optional): The short ticker symbol for your token. If empty, a general symbol ¤ will be used.
- Premine (optional): The etcher of a rune may optionally allocate to themselves units of the runes being etched. This allocation is called a premine.
- Amount: The Amount field contains the amount of runes each mint transaction receives.
- Cap: The number of times a rune may be minted is its cap. A mint is closed once the cap is reached.
Click “Next” after filling out the form.
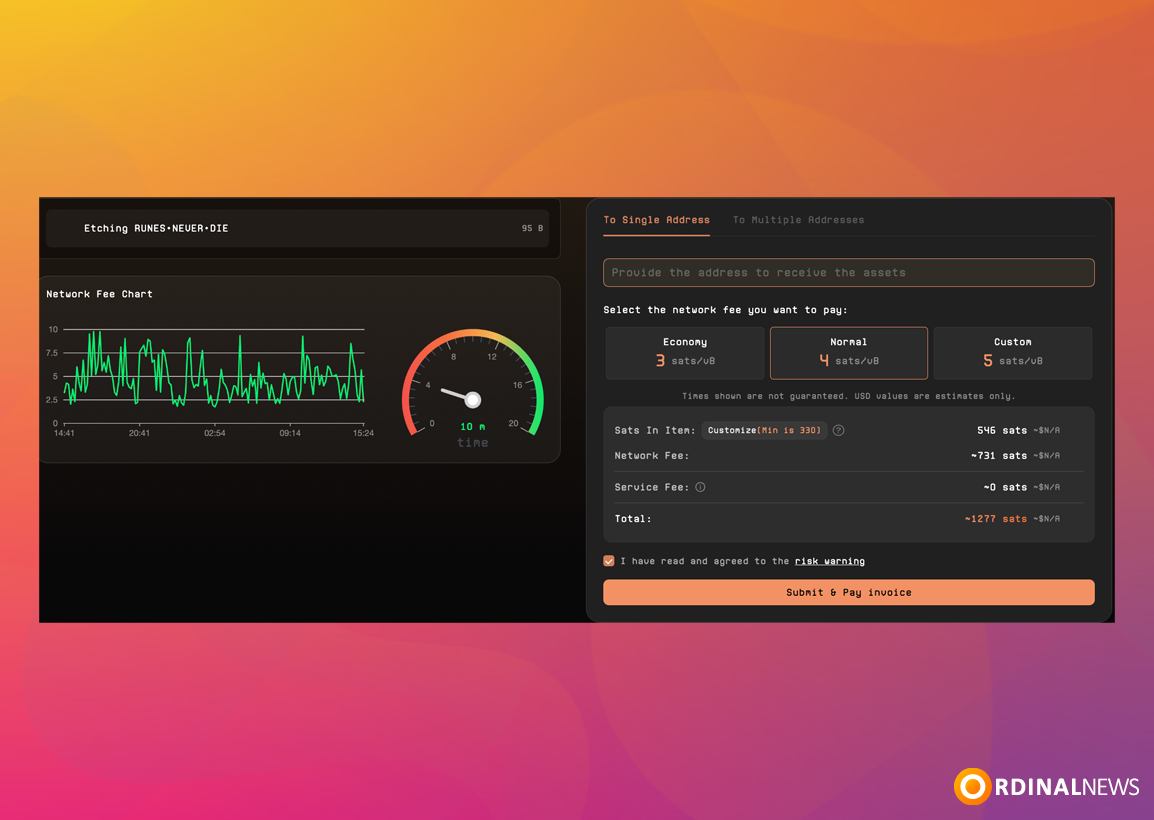
Step 3: This page shows you how much it costs for Etching Runes. Enter the address to receive the assets.
You can also set the network fee here. The picture shows “Normal 4sat/vB” and “Custom”. Click on “Custom” to set the network fee rate.
Step 4: Click “Pay with Wallet”
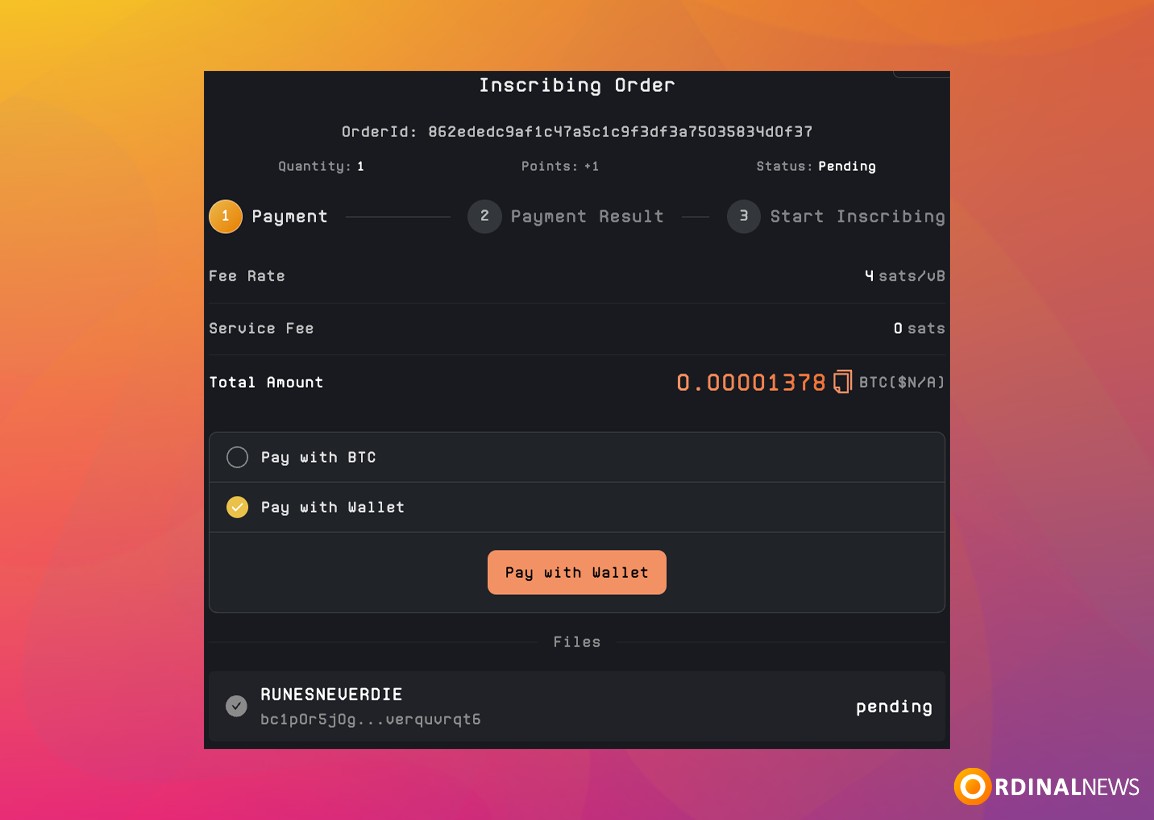
Step 5: Confirm Transaction
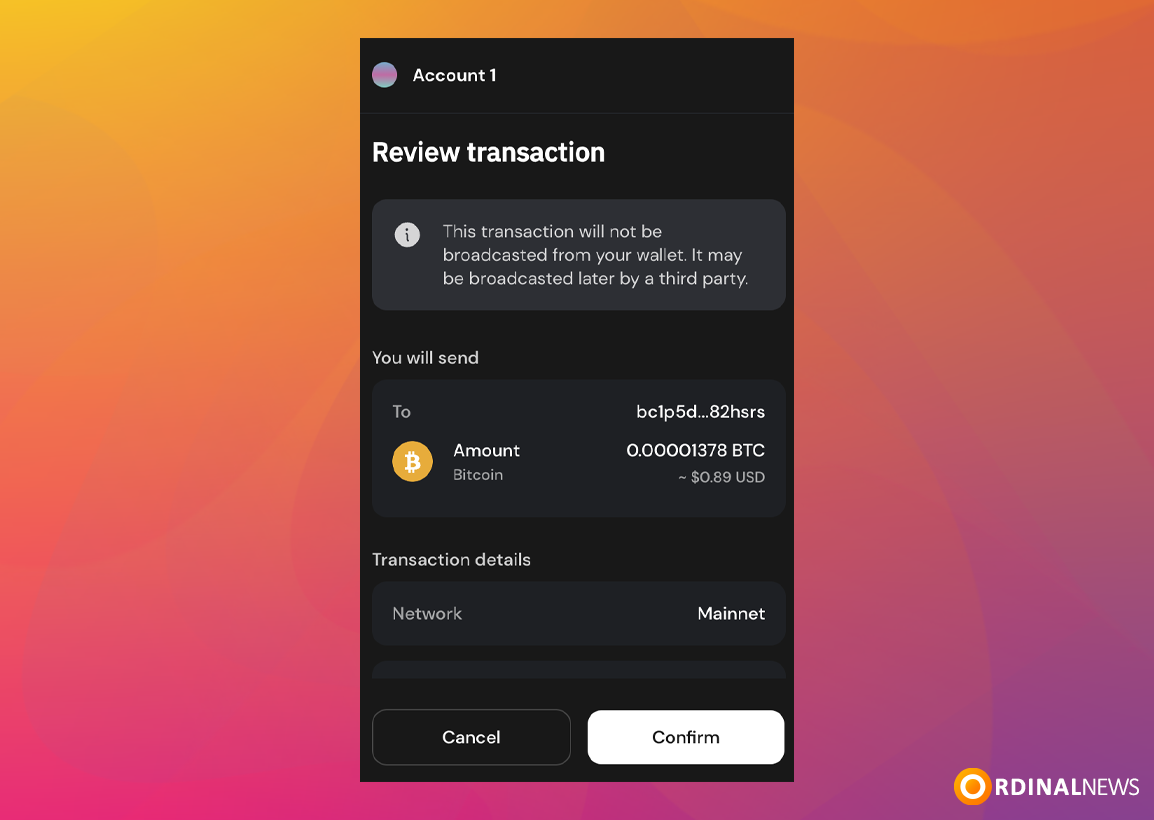
Step 6: You successfully Etch Rune. Wait for the transaction confirmation.
NOTE: You need to wait for 5 blocks confirmations for etching. Transcation confirmation takes a minimum of 60-90 minutes.
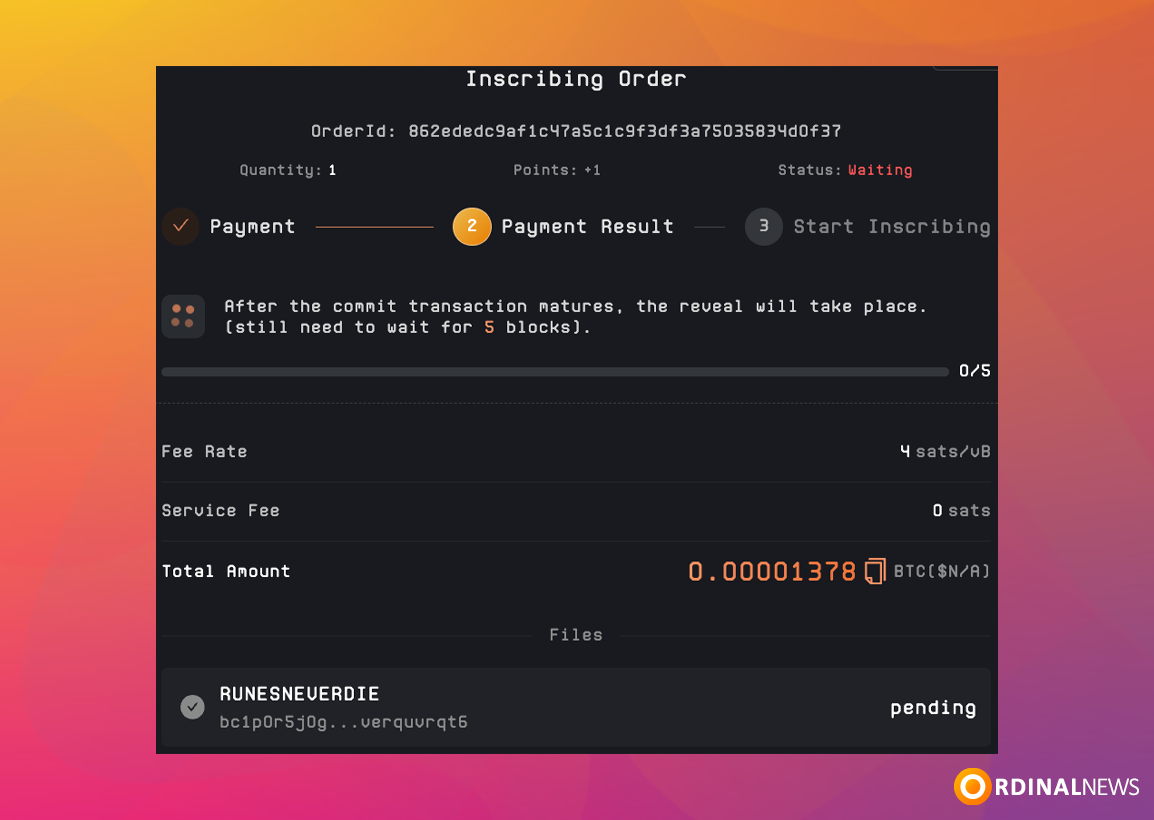
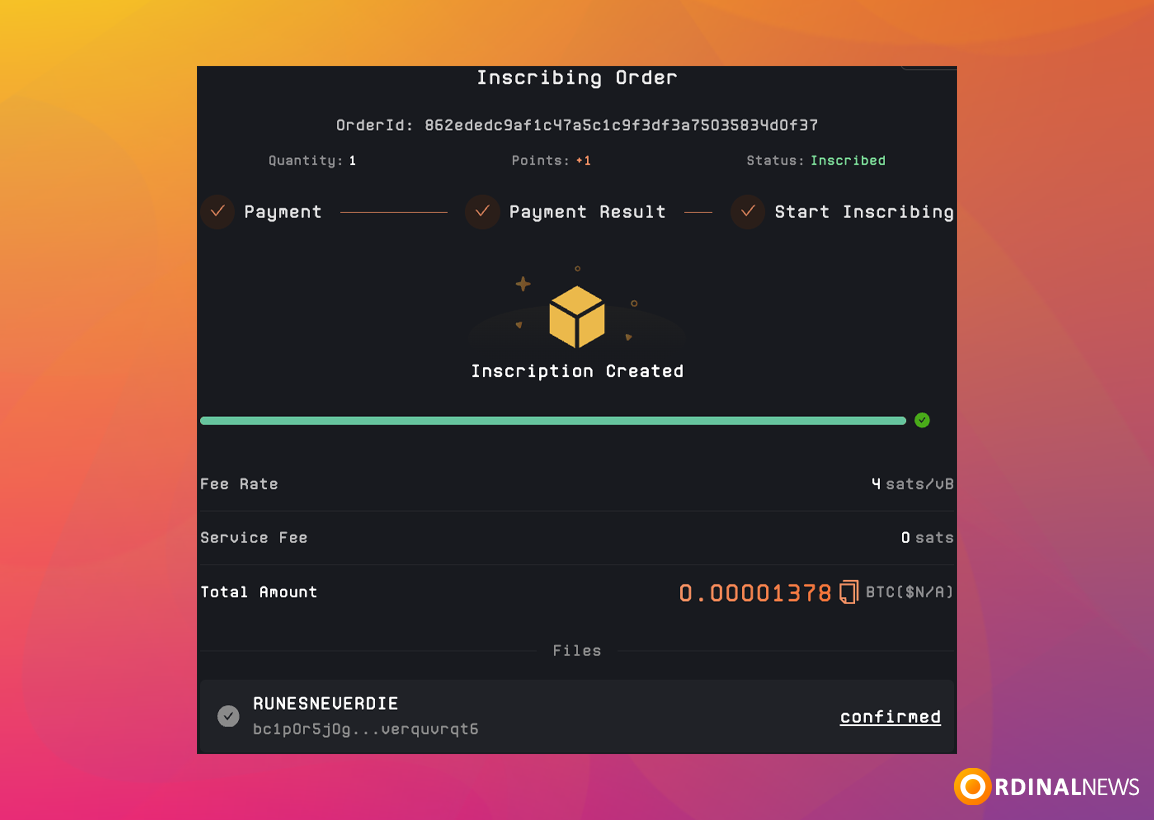
Step 7: After 60-90 minutes, you’ll see “Inscription Created“.
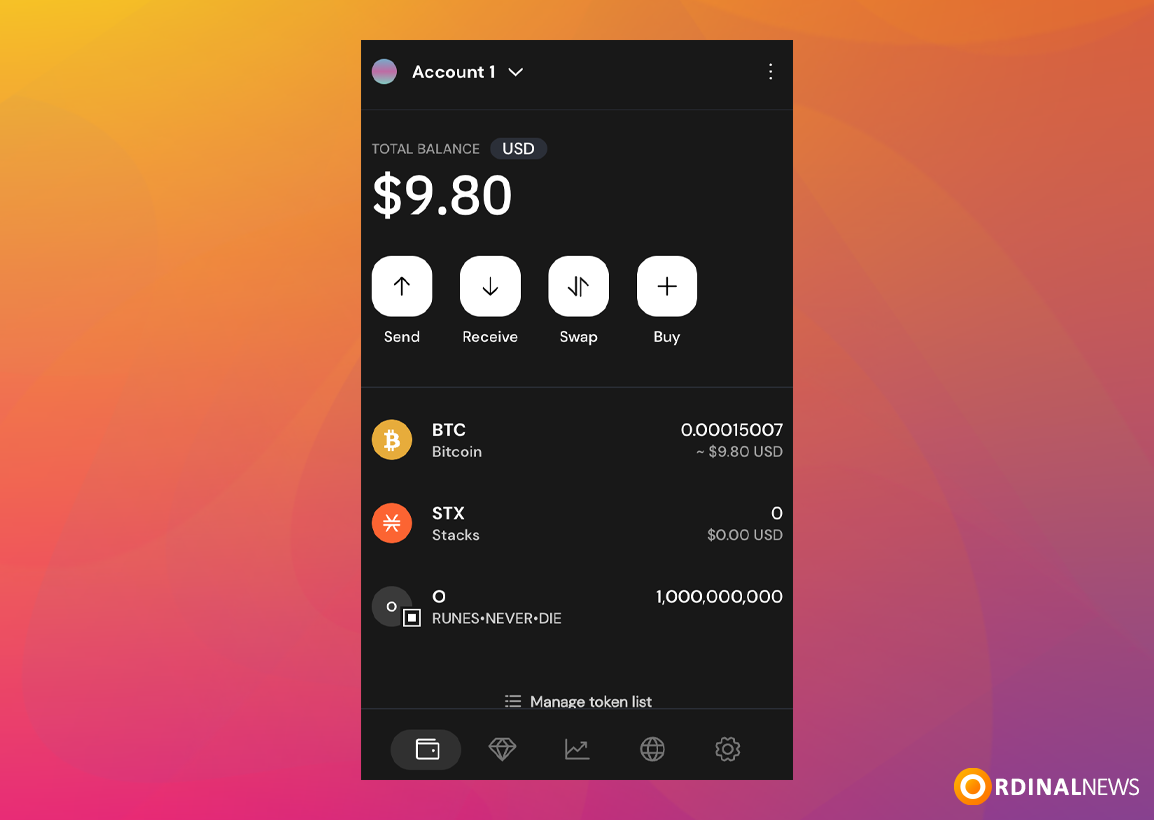
Step 8: You can view the Rune token you etched in the “Main” section of your wallet.
NOTE: The Rune token we are deploying is intended solely for testing and educational purposes. This should not be considered as investment advice. Please keep in mind that this is part of a learning process, and any interaction with the token should be treated as such, with no expectations of financial gain or returns.
The tutorial guides users through the steps of creating a Rune token using UniSat. It starts with filling in the token’s details, such as its name and supply cap, and then proceeds to setting fees and confirming the transaction. Once etched, users can view the new Rune token in their wallet’s collectibles section. This guide is for educational purposes only and not investment advice.

